Showing posts with label Recipes. Show all posts

Friday, June 15, 2012

How to conquer your parents basement and turn it into a darkroom.

Divide and conquer...

Transform and reinvent...

Sweep in and kill the spiders...

Lost yet?  Don't worry, my parents were too for a while.

This summer I made the decision to fly back home for two months and take summer classes, albeit online.  One of my classes is another historical printing process course and thus requires a darkroom. I had looked into the Buffalo area and tried to find a community darkroom at a University or community arts center with no luck.  Being stubborn savvy, I decided to try and take my parents basement and turn it into a makeshift darkroom.

There were three main issues that I needed to resolve before committing to this project.

1.  Light tight.  My parents have six glass block windows that sit ground level to let light come through into the basement.  I had to figure out a way to cover them up in a semi-permanent way.  This was the easiest problem to solve once I bought this product.  Blackout plastic.  Easy to cut, easy to put up with some black ducktape and easy to remove when the time comes.

2.  Chemical disposal.  I had to figure out what processes I am going to use this summer and how to properly dispose of any excess chemicals.  In my case, I will be working with historical processes that are mostly water based developing.  (Cyanotype, Gum Bichromate and Van Dyke Brown)  In the case with VDB, any used fixer that I accumulate will be properly labeled and sent to a local photo lab for disposal.

3.  Exposure.  Figuring out how to create and control UV exposure was my biggest problem.  Working outside with sunlight is too unpredictable, so I knew I'd need an Ultraviolet exposure unit.  I looked into buying one but was shocked by the hefty price tag.  ($600+)  So I enlisted my father to help me put together a simple box with two ballasts attached to the top and a front swinging door.  (I'll put together a post on how he made it tomorrow!)

With these three problems solved, the rest was just a lot of elbow grease, pushing random things into corners of the basement, and avoiding the scary amount of spiders.

And since I have no photographs to illustrate anything of this above [yet], I leave you all with a photograph of my dinner tonight.  Pizza on the grill!  Jim Lahey's dough recipe here.


Friday, January 20, 2012

DIY Vanilla Extract


I am not a huge Vodka fan. 

It reminds me too much of college parties and this terrible concoction that was made called, "Jungle Juice".  (Buy a Tupperware storage bin.  Buy the cheapest Vodka you can find on the lowest shelf,  add a few gallons of assorted fruit juices and soda.  Mix in bin.  Charge $5 a cup.)

It's hard for me to appreciate Vodka. 

Maybe because it can be made quickly and cheaply.  It doesn't need to mature or age, much like a nice wine or hard bourbon.  Or, maybe because most stories begin with a vodka mixed drink and end with someone clinging to a toilet bowl as if it were the sinking Titanic.

And why?!  Why are all Vodka ads showing sexy bikini clad robot ladies???  Or skin tight latex leather clad ladies.  Or sexy bikini clad spy ladies... 

Nevertheless, I happen to own a full liter of Vodka.  :(

I'm not sure why and I haven't touched it since the purchase.  (About a year ago)  And being stingy, I cannot see getting rid of it.

So I made vanilla extract.

Yes, that stuff you use so parsimoniously in baking.  Used so minimally, that you wonder if you even need it...

But think of that last great cookie, pancake or rich frosting you had ever tasted.  More than likely, the smooth and creamy flavors all came together based off this one key ingredient.

And making vanilla extract is so easy, cheap and sure to last you a very long time...just as long as you have that dusty bottle of Vodka on hand!


To begin with.  You'll need to purchase a vanilla bean.  Do not run to your first local grocery store and pay over $25 for one dried up vanilla bean!  Just buy them online.  Better yet, buy them off of Amazon and get free two day shipping from your Amazon Prime account.  These beans are Madagascar vanilla beans.  They're thick, plump and full of vanilla-y goodness.  I bought two from Beanilla through Amazon for less than $4.  They came vacuum sealed.  When I opened them, they were still moist, (Which is what you want!), and smelled amazing.

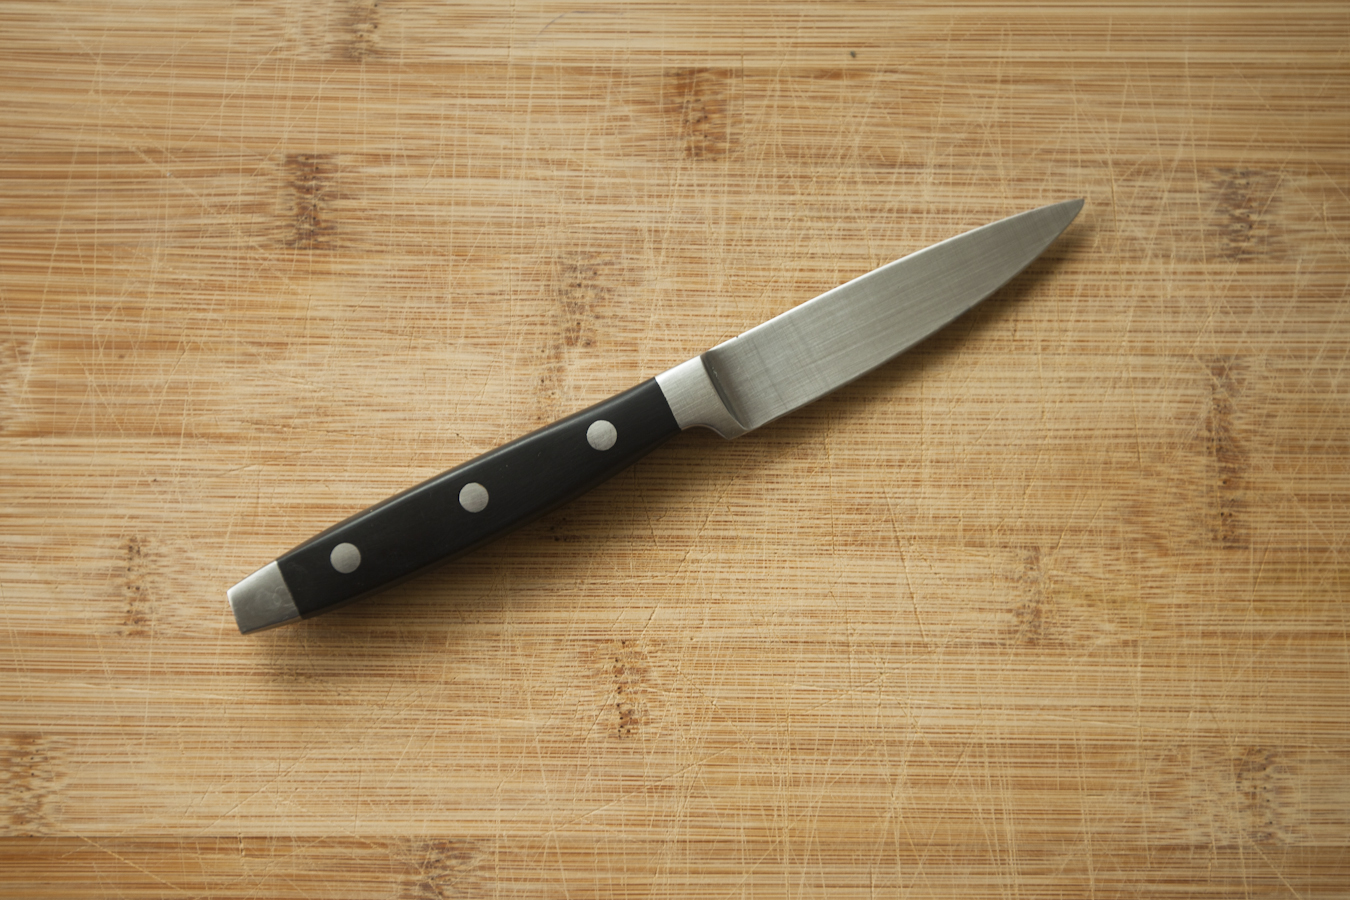
You will also need a knife,

A container to make your extract in,

And that cheap Vodka you've been hiding around!

Cut one bean in half.  Slit the bean through the middle.

Scrape out the seeds.

Place the slit bean halves and scraped seeds in your container.


Pour in your cheap Vodka.  (You may also use a rum if you like a rummy-er vanilla extract taste.)


Place the lid on and allow the extract to macerate in a cool and dark place.


And what did I do with the other bean?
I buried it in my sugar jar.  The vanilla aroma will permeate the sugar and make for a "vanilla flavored" sugar.

Your extract can be ready in as little as four weeks.  But like a good wine, with time, the extract will mature with deeper flavors and richness.  Also, shake your Vodka occasionally every few weeks to mix the flavors.  After the initial maceration, you may begin using your extract for cooking and baking.  But save the beans!  You can strain them out and reuse them to make more extract indefinitely.  Or keep them in the jar and keep topping it off with more Vodka.

Wednesday, January 11, 2012

Grapefruit and Mint Bourbon Cocktail


I cannot claim much knowledge on the art of mixing, but I do occasionally make a cocktail or two.  Thom and I can together a strong old fashioned or Manhattan, but we rarely venture past old standby's.  Typically I find most cocktails to be a bit too flashy, too complex, too sugary, and too expensive.  When I see those high fructose corn syrup infused rums, or sugary sweet mystery alcoholic concoctions, I cringe.  Conclude that drink with a bar tab equivalent to a weekday lunch bill, and you've found that the modern alcoholic mixed drink has gone mad!

I also carry too much of that Type B personality and refuse skip exact measurements.  This is a must for the perfect mixed drink.

So when I came to find that I wanted something refreshing, bubbly and alcoholic, I looked to see what I had on hand in my refrigerator and fruit bowl...

Grapefruit!

Seasonal.

Fresh.

Citrus-y. 

Perfect.

I added a few sprigs of mint to counter the citrus and I basically followed the same recipe for an old fashioned with a few variations.


Grapefruit and Mint Bourbon Cocktail
Serves 1

-2 oz. Bourbon 
-2 Dashes of Angostura Bitters
-1 tsp simple syrup
-Juice from 1 Pink Grapefruit quarter
-a few leaves of mint
-Ice
-Club Soda

Wash and dry off the mint.  Chiffonade mint and place in glass.  Add bourbon, bitter and simple syrup.  Squeeze grapefruit quarter into glass.  Mix.  Add a handful of ice.  Top off the drink with club soda.  Chin, chin!

Monday, November 7, 2011

French apple tart


I'm in some deep trouble.

Like "I dug my own hole" kind of trouble.

Never, ever, ever show delicious looking food shots to a three and a half hour critique!  EVER!

Last week's shots above are created from the recipe here for an apple tart.  Everyone loved the photographs.

Which is bad.

And great!  (Yay, they liked my photos!)

But mostly bad.

Because now I must bake and bring in another pie tomorrow. . .


. . .to eat.

You may call me the class short order cook now.


Thursday, September 1, 2011

It's September.


Wow.

I can't believe that it is September first today.

What happened to the time?  What happened to this summer?  Better yet, where did August go?!

If you're like me, you're still thinking it's August 7th or something silly like that.  I can't seem to get over how fast time flies.

Anyway, I finally made it back to San Francisco after a full day of traveling from New York.  (With a small side step to Florida along the way.)  Oh, and a small side note.  When I packed for New York, I had brought two cameras.  After returning back to San Francisco, I some how had five!  I bought a Holga, 1930 Kodak Brownie and Canon Snappy.  Can't wait to show some pics soon.

Most of these photos in this post were taken since being home early Wednesday morning.  I did a lot of catching up with my favorite furry man, Connor.  I baked some delicious muffins and got a great meal together today.

The muffin recipe is based from Lara Ferroni's baked donut recipe found here.  I don't own a donut baking pan, so I opted out and made muffins instead.  I also was out of paper liners and just cut up some left over parchment paper to line the muffin tin.

The other photograph is a meal of open-cut ravioli with poached egg and wilted greens.  That amazing and delicious recipe can be found here, via The Kitchn.  The flavors of the bitter greens with the zesty brown lemon sauce and creamy egg blended well together.  I also like that the "ravioli" happened to be lasagna noodles cut up in thirds.  I never seem to finish off a whole box of lasagna noodles, and this was a perfect way to incorporate them.

Lastly, I was excited to hear that the crafty and creative people at Design *Sponge put together their first-ever summer edition newspaper.  I found out that they were distributing them out in Brooklyn and missed my opportunity while in New York two weeks ago.  Instead, I asked Thom to stop by the General Store and pick me up a copy to read when I got back to San Fran.  It is a great edition, full of interesting DIY projects and features some awesome people in San Francisco who just happen to live in my neighborhood!


I can't wait for this weekend to start (since it's Labor Day Weekend) and am so happy that tomorrow is Friday!  I hope that everyone has a great tomorrow and long weekend ahead.  :)

Monday, August 22, 2011

Jumping on the bread wagon


Yep.

It finally happened.

I gave in.

After reading other blogs and articles, I finally jumped on the wagon and tried the no-knead bread recipe.  This recipe has been circling the interwebs for a few years now and since I received my french oven a few months ago, I've been wanting to try the easy to make bread recipe.

And it is everything that everyone has said it would be.  Warm, flavorful...and that amazing bread smell!  My only regret was that I made it shortly before I left for my New York getaway.

You can find the recipe from the original post by the New York Times Journal, adapted from Jim Lahey from the Sullivan Street Bakery.

In other news, I photographed an amazing wedding at the W hotel in 'Jersey.  I hope to share a few of those images soon!

I hope that everyone had a great weekend and Monday.

Tuesday, August 16, 2011

Slow food is forever worth the wait.


I had first heard of the Slow Food Movement while studying abroad in Genova, Italy, a few years back.  And honestly, I didn't understand the true meaning until finally moving to San Francisco this past January.  I had thought that slow food meant taking way too much time thinking of an impossible meal, buying too-expensive ingredients in order to make a Thanksgiving Feast, which is only to be gobbled up in minutes after cooking.  
After trying the new American/San Franciscan cuisines, buying local produce, paying attention to the importance of "in season and following, what I like to call, "gateway food blogs," did I truly begin to understand how slow food can change the way you think and feel about food.

Slow food isn't complicated.  By far, it's experiencing your food in the best and simplest of ways.  
It's about learning which foods come into season and how to create harmonious blends of flavors.  
It's knowing certain scientific facts about your food.  Like when you combine yeast with sugar, fermentation will occur, creating carbon dioxide gas.  It is that process that creates that light, airy and chewy texture in bread.  And it only gets better when you let the process set up and rest for a long period of time.

Slow food creates a certain environment while eating.  No longer is dinner considered the third meal of the day.  It is a meeting and gathering of family and friends.  The experience of good food, sustaining drink and warm conversation is the end goal of slow food.  It becomes more of a way of life rather than a complex meal.


Monday, August 15, 2011

Whole wheat spinach, ricotta and spicy sausage calzones


Q:  What's for dinner tonight?
A:  Calzones


But not just any calzone, a traditional Italian kind with a spicy kick.  You see, when I grew up, calzones were just inverted pizzas with the crust all over.  I never thought that they could be more than just American shredded moz cheese and pepperoni, side-kicked with store bought Ragu for dipping.  It wasn't until a college trip to Italy, did I find what a real calzone could be. 

This calzone takes the traditional spinach and ricotta cheese pairing up a notch, with the addition of a very hot and spicy Italian sausage.  I used fresh spinach (instead of the frozen box kind) and real minced garlic (which anyone can say makes all the difference!)  I also used a half white and whole wheat flour mixture instead of using only white.  I find that half & half flour recipes create meals that keep one satiated. 

Below, you'll find my step by step progress through this easy and delicious meal.


Whole wheat spinach, ricotta and spicy sausage calzones
(Yields four calzones)

Dough Ingredients:
1/2 Cup (plus extra 1/2 cup for kneading) White All-Purpose Flour
1/2 Cup Whole Wheat Flour
1 Package of instant dry fast acting yeast
1 teaspoon White Sugar
1/2 teaspoon salt
2/3 Cup of warm water (120 degrees or so)
1 Tablespoon Olive Oil

Cheese Filling Ingredients:
3/4 Cup Ricotta
3/4 Cup Shredded Mozzarella Cheese 
1 Large Egg
1/8 teaspoon Fresh Ground Pepper

Other Ingredients:
Three sausage links of choice, casings discarded
2 Cups Fresh Spinach, washed and dried
1/4 Cup of water
1/4 Cup Diced White Onion
1 Tablespoon Minced Garlic
Salt and Pepper to season

Oven Temperature:  375 Degrees Fahrenheit 


Prepare Dough.  Start by mixing together the flours, yeast, salt and sugar.  Add the olive oil and water and stir to create a sticky dough.  Dust a clean surface and knead in the other 1/2 Cup of white flour to create a firm dough that does not stick.  Place in a clean and greased bowl and cover with a fresh linen.  Set the bowl aside while preparing the rest of the ingredients.


Wash and dry about 2 Cups of fresh spinach.  Break off any stems.  Tear leaves in half if large.


Dice onion and mince garlic.


Cook sausage in large skillet.  Once the meat is cooked through, about 10 minutes, drain on a plate lined with paper towels.


Next cook onion and garlic with some olive oil.  Salt and pepper to season.  Once onions are soft (about 5 minutes) add the spinach with a 1/4 Cup of water.  Place lid on pan to wilt the leaves.  Once leaves are wilted (about 2 minutes) drain any excess water and add back the sausage to the pan. Cook all ingredients through for an extra couple of minutes.  Turn off burner and set pan aside.


Create cheese filling.  Add ricotta and mozzarella cheese, pepper, and one egg to a small bowl.  Mix all ingredients together until well blended.  Set bowl aside.


With a floured surface ready, divide dough into four equal quarters.  Roll out each quarter of dough to form a circle with a diameter of 8".  With cheese mixture at hand, spread out a small portion on half of the circle of dough.  Next, place a spoonful of the meat mixture.


Fold over the dough to form a half circle.  Pinch ends closed and place calzone on a prepared baking sheet using a flour-dusted spatula. 


Using a small knife, make three slits on each calzone.  Next, brush the calzones with olive oil and sprinkle salt on top to finish them off. 


Place calzones into the center of the oven and bake for 20-25 minutes.


When the calzones are done, they should be a nice golden brown.  Place on a wire rack to cool for about 5 minutes before picking one up and tearing into it!  The bread should be warm, with a slight sweet taste, while the inside is savory and spicy.  

Enjoy.

Sunday, August 14, 2011

Simple Sunday

 I met this weekend head on and conquered it like a boss.

I sewed, cooked and juiced my way into a better mood.  I also want to thank all of the people that reached out and supported me from my last post.  It means a lot y'all, I'm touched.


Sundays are always those wonderful days where life slows down and breathes a sigh of relief before the next week rush.  I love walking to my local deli, picking up the Sunday paper and getting to go through the whole thing, front to back, while drinking a nice hot cup of coffee.


 Thom and I have re-ignited our juicing philosophy, so I've been making a few more trips out to local produce stalls and markets.  This past Thursday, I ventured out to the Castro Market on Noe and Market St.  It's small, tidy and humble, but I thought it was plentiful and endearing.


I made a venture out later today to check out Green Apple Books in the Richmond Neighborhood.  Completely overwhelmed by everything that they offered, I ended up finding a used copy of Pride, Prejudice and Zombies for $8.  I'm sure I'll be quite entertained on my flight back to New York.


Later, I caught cooking inspiration from some leftover quinoa, fresh produce and a new tart pan.  I rarely ever eat a meat-free meal but after cooking up the zucchini and tomato ricotta tart, along with a vegetable quinoa, I didn't miss having meat one bit.

All in all, a wonderful and slowed-down Sunday. 

I hope you all enjoyed yours as well!